
Friday, August 20, 2010


Thursday, August 12, 2010
Fried Gluten Recipe

Ranch 99 is a place of wonder, even for those of us familiar with Asian grocery markets. The aisles are clean and well lit! The food is stacked neatly on shelves! Although I still maintain that Oakland Chinatown is the best place for produce (Ranch 99 has an annoying habit of wrapping its fresh produce in Styrofoam trays, much like Trader Joe's), Ranch 99 is a good source for pantry items. You mostly likely will not find an item where you think it should be, but if you have patience, you will succeed.
 While looking for something else entirely, I came across a pound of gluten flour for a smidgen over $1. Why not?, I thought. Into my hand basket it went. Although I can buy fried gluten balls in the refrigerated section, the balls are fried with soy or cottonseed oil, and I find that they often taste stale, so I never buy them.
Fried gluten balls are one of my favorite things to eat. Plain, they're bland. But if you pair them with seasoned pork, OMG! Biting down into a gluten ball, you get the satisfying chew of the gluten combined with all the juices from the seasoned pork. It's what I imagined Willy Wonka gum would be like (meal in a gumball!), without the side effect of turning into a blueberry.
 To make gluten from gluten flour, or any wheat flour really, you add just enough water to make a dough, then knead away! Although I used to do this by hand, back in the days when my grandmother didn't know what to do with my brother and I hanging around her space, I now use my handy dandy mixer.
 Once your dough is springy to the touch, it's time to gather it up and give it a good rinse. Rinsing away the flour yields a brainy looking ball of gluten.
 I really was not sure what to expect since my bag of gluten flour had very little English writing, but I am happy to report that a 17.7-ounce bag of gluten flour produces 7.25 ounces of gluten (a 41% yield). Back in the olden days, I'd get a ball this size from a 5-pound bag of flour!
Once the ball of gluten rested and relaxed, I pinched off pieces of gluten and formed them into balls about an 1" diameter.
 Then, the balls were fried in my wok in 350 °F peanut oil. If you press gently roll the balls against the side of the wok, they'll puff up more. Since the raw gluten balls are wet, a pair of foot-long chopsticks are handy to avoid splattered oil on your person.
When the balls are golden, remove them and let them cool on some paper towels. The fried balls are great in soups and stews since they soak up the flavorful liquid without falling apart or losing their texture. My favorite preparation is to cut them in half and stuff them with seasoned pork. After they are stuffed, I steam the stuffed balls for 30 minutes (see pic at the top of post).
Green Radiate
 Against the backdrop of our living room curtains, once again, I present to you: Radiate.
I finished this cardigan back in May with the notion that it would be the perfect for the summers here. Unbeknownst to me, this year's "summer here" is covered in a marine layer. Yep, fog. Now, to be fair, fog in the summer is a usual occurrence, but peaks of the sun do shine through and temperatures are slightly warmer. The summer cardigans I've been sporting lately are no different from the winter cardigans I wear, so I suppose I should take a glass half full approach and appreciate the unexpected extended wear I am getting out of my favorite cardigans.
This was knit with 5 skeins of Karabella DK Merino Silk, another 50% off yarn I bought at Stash's moving sale last year.
I made a few mods, namely casting on more stitches for the neckband, knitting the neckband and sleeve bands in seed stitch, and crocheting a couple of closures instead of adding buttons. More details on my Rav project page. I'll fill in more details when I can find my knitting notebook.
Overall, I'm feeling meh about this cardigan. I love the color. I love the yarn. I'm not in love with how it hangs, and I wish I would have done less increases on the body. As it is, I knit one less increase to compensate for the wider neckband.
Monday, August 2, 2010

Sunday, August 1, 2010
Hot Braised Fish and Sad Lemons

When I cook whole fish at home, I opt for simple. The fish is either steamed, baked, or grilled, and I serve it with a simple treatment of salt and pepper and perhaps some aromatics like cilantro and ginger. However, when I go out to a Sichuan restaurant, a hot braised fish always makes its way to my table. Chopstick wars ensue as everyone at the table forgets the other dishes on the table and attacks the fish.
Hot braised fish, at its best, has crispy skin, sweet flesh, and a pungent, spicy chili sauce adorned with flecks of ginger, garlic, and green onions. No wonder it makes people crazy.
Armed with Land of Plenty, I decided to make my own hot braised fish so I wouldn't have to share it with anyone but the boy. (I bought two trout so we had one each - no fighting.)
The secret in the sauce turns out to be, no big surprise, the chili paste. I spent 20 minutes reading all the chili paste labels in Ranch 99 before finding the secret sauce: Pixian doubanjiang, a chili sauce made with fermented fava beans instead of soybeans. The only ingredients should be chili, broad beans (fava beans), and salt. The brand I bought, wrapped in paper and tied together with twine, has "Sichuan Pixiandouban Co. Ltd."on the label. There was also wheat flour in the ingredients list, but I couldn't find any other brand at Ranch 99 that contained fava beans sans flour.
 My first attempt at this recipe turned out delicious, but I would do a few tweaks next time, like dredging the fish in tapioca flour or rice flour before I fry it, and adding less light soy sauce - the chili sauce was pretty salty by itself, so the soy sauce made it over the top with salt. Exacerbating the saltiness of the meal was the homemade cabbage kimchi I served as a side dish.
My next Sichuan ingredient scavenger hunt item is "facing-heaven" chiles. I spent another 5 minutes at Ranch 99 in the dried chili section trying to find them, but my desire to drink a taro root flavored tapioca tea trumped my desire to find these particular chiles. Next time I'll take a longer look.
Sadly, there will be no meyer lemons for me this year. This is what my lemon tree currently looks like.
 I even watered, fertilized, and lovingly talked to the darn thing, but something got to it. Until today, I blamed the local deer. They seemed like the obvious culprit, although nothing else in the front yard has been touched by a deer.
Today, after doing much yard work (this weekend, the boy and I were weekend chore-iors), the boy had theory that snails ate my lemon tree. I think he's right. There is a disgusting amount of morning glory and ivy creeping from a nearby wall onto my tree. I have to periodically chop back the morning glory, or else it will choke my plant. You know what else lives in that disgusting morning glory? Snails. Tons of snails. I chopped the morning glory back today and found at least 10 of them in less than 1 square foot. Blech. Where's a duck when you need one? I'm hoping that cutting back the morning glory means that the snails won't have freeway access to my plant anymore. Fingers crossed.
Damn snails.
Tuesday, July 27, 2010
And More Food
 Roasted tomatoes give lackluster tomatoes a chance to live up to their full potential. A basket of cherry tomatoes followed me home, which usually happens after a trip to Monterey Market. These tomatoes, from Fully Belly Farm, were a little watered down, probably due to the unusually cool summer we're experiencing here.
I have a fear that my two tomato plants are going to produce lackluster tomatoes because the fog is ever present this summer. At least those tomatoes can be saved with some slow and low heat (250 °F), a sprinkling of salt and pepper, dried oregano, and some olive oil. I like to throw garlic cloves, skin on, into the mix since roasted garlic is better than candy.

I take the tomatoes out of the oven after 3 hours. If you don't snack on all of them, you can use these for a simple angel hair pasta dish with basil and Parmesan cheese.


Usually, the oven stays idle during the summer, but it's cold here! I even roasted strawberries tossed with a dash of balsamic vinegar and a scant amount of sugar. They went really well with pork chops.
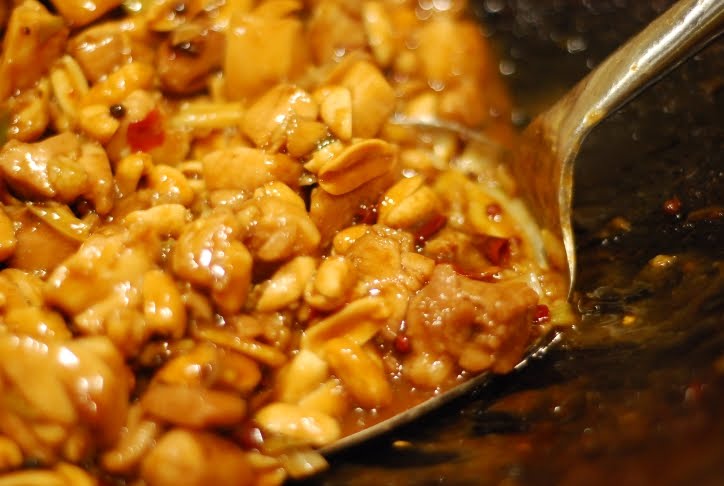 Cool weather also means that I get a hankering for spicy food. I just nabbed a copy of Fushia Dunlop's Land of Plenty, which brought back memories of my bike tour in Chengdu. Sichuan food is so different than the Cantonese food I cut my teeth on, so having Dunlop's help to demystify the techniques and spices has made for fun bonding time with my wok. The kung pao chicken recipe is worth the price of the book!
 Refrigerator pickles are also happening in these parts. I made a huge batch of Vietnamese style daikon pickles, which is nothing more than a rice vinegar and sugar marinade. Salting the matchsticked daikon and letting it drain for at least 2 hours made the resulting pickles nice and crisp.
Nothing interesting is on the needles or the hook. I'm having to dig deep to finish up a super secret knitting project because reading and cooking are my preferred "I just to need to relax" projects.
Hopefully, I'll have news of ripened tomatoes the next time I blog.
Saturday, July 24, 2010
Cinnamon Apple Rice Pancakes

Apple season is coming once again, but before we can any more apples, we need to finish up the our stock of applesauce from apple seasons past.
I had read that applesauce can be used as a substitute for oil, so when I came across this recipe for rice pancakes from Serious Eats, I knew it would be a good way to use up my excessive rice flour stash as well.
It worked! The pancakes were delicious, but I had to turn down the heat to medium instead of medium high to keep them from scorching. My first couple of pancakes went to the dogs, who fancy themselves pancake connoisseurs, but they also eat cat poo, so they really don't get a say in what is delicious and what is not.
So, if you find yourself with a glut of applesauce, rice flour, and a bit of xanthan gum (this seems to be a staple for the gluten free crowd), give these a try!
Cinnamon Apple Rice Pancakes
serves 2
Adapted from this post on Serious Eats
Dry Ingredients
1/2 cup white rice flour
1/4 cup cornstarch
1/4 cup sweet rice flour (sometimes called "glutinous rice flour")
2 Tablespoon sugar
1 1/2 teaspoon baking powder
a pinch of salt
1/8 teaspoon xanthan gum
1 1/2 teaspoon ground cinnamon
Wet Ingredients
1 egg
1/2 cup milk
1/3 cup applesauce
1/2 teaspoon vanilla extract
1. Measure out the dry ingredients into a bowl. Whisk them together.
2. Measure the wet ingredients into a separate bowl from the dry ingredients. Whisk them together.
3. Pour the wet ingredients into the dry ingredients bowl, and whisk until smooth.
4. On an oiled griddle over medium to medium high heat (whatever makes your batter sizzle on contact), pour batter. Flip when the underside of the pancakes are lightly brown, about 2 minutes if you use 1/2 cup of batter per pancake. These cook fast, so be careful about burning them! Cook another minute, then pop them into your mouth.
Tuesday, July 20, 2010
Plum Jam
 For the first 5 years that we had the house, the plum tree was a messy annoyance. The plums were little with a huge pit and sour skin - nothing to rave over. The dogs would step in the fallen fruit and track it all over the yard and the house. Annoying.
Then two years ago, thanks to the Ball Blue Book of Preserving, we learned to can. No fruit tree is safe from us.
 Last Sunday, the boy spent the day in the backyard trimming trees and picking the plums. He ended up with three bags full of fruit, and I'm guessing that it was about 30 pounds. After I sorted through the plums and cut off the bad spots, I ended up with four huge pots of plums.
To each pot, I added a bit of water, and then let heat soften the fruit before I remove the pits and skins.
 Since the pits are too large for my food mill, I use a strainer and the back of a soup ladle to press out the pulp.
 I was left with two pots of plum pulp, which I boil up and add some sugar. I'm skimpy on the sugar since I use the plum jam to braise lamb shanks, chicken thighs, and chuck roasts. Last year, I ran out of plum jam in February, and I was very sad. This year, thanks to the boy's amazing tree climbing abilities, we have 17 pints of jam! That should last us until next season!
I need to figure out how to make hooch from all these plums. Maybe next year.
Monday, July 19, 2010
Kimchi, Dead Fish, and Dog Butt
 Behold, the saltiest meal on the planet! Not only do we have a few brined kimchis, but there is the Japanese curry made from spicy Kokumaro curry roux blocks. (For those who were following the my Japanese curry chronicles, Java Curry is the winner. Vermont Curry was bland, and Kokumaro was a close second.)
We hosted an impromptu kimchi and sour beer dinner gathering last Saturday. Sadly, I don't have any pics or notes from the sour beer tasting, but I can ask the boy and post results if anyone is sour beer fan.
I polled the dinner guests to see which kimchi was their favorite, but it the answers were evenly distributed. The most familiar and complex tasting kimchi was definitely the napa cabbage kimchi.
 I let this kimchi ferment for a few days in the kitchen, but when the days got warmer, I moved the jar to a cooler room. Total fermentation time was 1 week. The tang and spice level was just right!
 The cucumber and daikon kimchis did not need to ferment for very long. Some recipes I consulted said that they were ready as soon I they were finished, and to leave them in the refrigerator for a stronger flavor. Some of the daikon recipes required one to four weeks of fermentation. I suppose it depends on how long you are going to store them and the strength of your brine (lactobicillus, the bacterium that gives the kimchi its characteristic tang, can live in salty environment, but the more salt added, the slower the bacterium grows). I fermented both kimchis for 2 days.
I actually remembered to whip out the camera during my kimchi making frenzy.


For the cucumbers, I started with 1.5 lbs of Persian cucumbers.

Once they cucumbers were quartered, I tossed them into a nonreactive bowl (no metal) and I added 2 T of kosher salt.
 Look at all the brine! This picture was taken 3 hours after I salted the cucumbers. I let them sit for a few more hours before adding the rest of the spices.
 I tossed the brined cucumbers with some green onions, 1 T fish sauce, 1 T sugar, 1 T chili powder, and 6 cloves of minced garlic. They turned out crunchy, sweet, and salty! Before I served the cucumber kimchi, I sprinkled a little bit of roasted sesame oil over them. If I had toasted sesame seeds, I would have added those as well.
Besides the kimchi, I frantically finished a mini Dead Fish Hat for a baby shower. This project was fantastic for stash busting! I used so many odds and ends of my Tahki cotton stash.


 Instead of using felt for the eyes, I crocheted a couple of circles with kitchen cotton. The boy was kind enough to sew on the eyes since I detest hand sewing.
As a final note, this is why we shouldn't hang towels on the oven. Ahem... (You know who you are!)

Monday, July 12, 2010
Kitchen Experiments and Dogs
 Destashing my pantry led me to some more kitchen experiments. Experiment #1 is my kimchi. I didn't travel to the Korean grocery store in Oakland to get my Korean ground chilis. Instead, I decided to use some chile de arbol in the pantry, some dried shrimps, fish sauce, ginger, green onions (stem part only) and garlic. And of course, napa cabbage. (Organic napa cabbage will cost you your first child - I just reviewed the receipt I shoved into my purse. Scary, but at least everything else was hanging around my house.)
So far, the kimchi smells authentic, meaning that it's kind of stinky. The characteristic tang from the lactobacillus microbes hasn't set in, but according to the recipe, it I should taste the tang in a week or so.
I adapted the kimchi recipe from Wild Fermentation by Sandor Katz. The book's a little hippy crunchy (Katz's friends tend to have one word names like "Nettle"), but what I like about it is that he isn't fussy and he cheers you on in your fermentation exploits. I had read and watched numerous videos on making kimchi, and it wasn't until I read his description that I just went for it.
Katz also had a cool trick: He uses a smaller pint jar full of water as a weight stone for the bigger quart sized jar. I didn't want to funkify my crock and I didn't want 7.5 liters of kimchi, so this was perfect! The quart jar easily fits one pound of wilted cabbage.

Another experiment was miso ice cream. I was sure I'd love it, but I had to make it to prove to other people that it would be as good as I imagined. Googling miso ice cream recipes came up with things like "10 most disgusting ice cream flavors," so that was no help. If you'd like to make miso ice cream yourself, I suggest you buy shiromiso, the mildest of the misos. For 3 cups of liquid, I only added 2 tablespoons of miso. I could've probably gotten away with 1 tablespoon, but I wanted an ice cream that was decidedly on the salty side. I also made the custard style of ice cream and I added the miso after I tempered the egg yolks and added them back to the mix.

I'm fading, so before I retire, here's a couple of dog pictures from a recent trip.


Subscribe to:
Posts (Atom)
LinkWithin
