Showing posts with label cooking. Show all posts

Tuesday, January 16, 2018

Hella Vegan Meats

Chickwheat lemongrass chicken
When I'm into something, I'm really into something. So what is it now? Making mock meats from scratch. It turns out, although I don't know why I'm surprised, that I can make delicious mock meats as good as Field Roast at home. 

Chickwheat stir-fried with mustard greens
It all started with this chickwheat recipe from Avocados and Ales. The next logical step was to substitute different beans for the chickpeas to make fake beef and lamb.

Freshly shredded fake meats
The method is simple: blend up your mostly umami-filled ingredients with some liquid. This may include mushroom powder, miso paste, Marmite, soy sauce, and either tofu or beans. Then, knead the blended ingredients with vital wheat gluten and perhaps some chickpea flour or potatoes. Steam your loaf, and then shred it once it cools down. What your left with is homemade chicken/beef/meat substitute that is perfect for stir-fries! I've been making double batches of this and freezing it because I know that my obsession will come to an end and future me will be happy that I have a quick protein to cook.

Unribs using the recipe in The Vegan Pantry
No more Field Roast or sketchy mock meats from abroad! The boy, my eternal guinea pig, has given everything a thumbs up so far. The favorites are lemongrass chickwheat, and the Now and Zen burger and unribs from The Vegan Pantry. I tried a vegan corned beef recipe from Connie's RAWsome Kitchen, but I think I overcooked it and the allspice was overpowering. I'll try it again since I like the idea of using a raw beat in the wheat meat.

Have you experimented with mock meats and cheeses? I'd love to try some new recipes, so please lemme know in the comments!

Thursday, May 23, 2013

A Small Amount of Kale Kimchi

One bunch of kale and 3 carrots yields about 2 cups of kimchi
Carrots and kale abound in our garden, although for this experimental round of kale kimchi, I used the kale and carrots that came in my weekly CSA box. The idea is that in the near future, I can make kimchi from all the things growing in my garden, sans ginger and garlic. Oh, I know I can grow garlic here because other people do, but my garlic turns out wormy. Two seasons of wormy garlic and my drive to continue growing it is in the gutter. 

Carrots and Russian red kale
Loosely, I followed this recipe. I salted my kale and carrots instead of drizzling them with fish sauce, and I added 1 T of hot Korean chili powder and 2 T of Korean chili flakes. I also added minced ginger and reduced the sugar.

Reducing sugar intake has been a thing around here thanks to reading Fat Chance: Beating the Odds Against Sugar and Salt, Fat, Sugar: How the Food Giants Hooked Us. Admittedly, I am one bummer of a dining companion right now because I'll tell you how putting that sugar- and carb-laden dessert in your mouth will mess up your liver. Oddly, people don't want to talk about it, although I find it fascinating and I just bring it up because I think my companion will think it's fascinating as well and not because I am admonishing that person's choice of food. Apparently, I am out of control because the boy will come home, grab a beer, and go into another room as fast as he can so I won't talk to him about liver damage and visceral fat. He's glad that I'll be reading Cooked: A Natural History of Transformation next.

Beautiful red pepper paste made with fish sauce, rice flour, ginger, and garlic
More cooking thank knitting has been happening in these parts. I thought I'd be sick of cooking since we pulled off a party for 30 people with only 1 day of preparation and lovely friends who all pitched in, but it actually fired me up again. (You must make a Green Glove cocktail!) Well, that and the longer days. Staying inside and cooking when it is sunny outside is more appealing than staying inside and cooking when it is cloudy outside, although it makes no sense to me since I'm indoors in both scenarios. I guess I like the view best when it's sunny.

Tonight's dinner is pork belly braised with soy sauce, Chinese rice wine, star anise, cinnamon, dried chills, and plenty of ginger and garlic. The two pound pork belly from our meat CSA was beautiful, and I used half of it for a kimchi stew and the other half for this Chinese stew.

Time to eat! I hope you all have a wonderful summer!

Tuesday, March 12, 2013

Back to the Garden


What you see above is two years of vegetable scraps, dried leaves, brown paper bags, toilet and paper towel rolls, and egg cartons sifted into a wheelbarrow.


The compost is teeming with roly poly bugs and an occasional gross worm-like thing. (Millipede?)  Here's hoping that this will result in a snap pea bonanza! 


I'm amazed at the small yield considering how much scraps we generated every week. Between the compost and the worm farm, scraps get consumed around here. This compost was destined for the front yard garden after we took out the German radishes and aphid infested kale. Growing greens in the summer is harder for us since a call out goes to all the bugs in the area that there's an all you can eat buffet in our front yard. Apparently, the deer know it now, too.  Besides sugar snap peas and a collard tree, we're unsure what to plant.

The reason we are unsure of what to plant is partially due to our Fully Belly Farm CSA - we don't want to grow things that are redundant to our farm box. Although we can grow radishes, I don't necessarily need to eat loads of them and we usually receive a bunch a couple times a month. Plus spring and summer are times to plant the alluring vegetables like tomatoes and snap peas, vegetables that taste best fresh off the vine. That being said, we'll probably plant more carrots since the royal chanteys are a sweet treat and pest resistant. I would plant more greens like chard, bok choy, and kale, but last summer we had loads of leaf mining insects. I should probably look into organic ways to control those pests because we go through a lot of greens. If you have any suggestions for what to grow or natural pest control, please let me know in the comments.


As mentioned before, the ants have infested our kale with gray aphids. I picked the last of the leaves, inspected them carefully, and chopped them up for a raw kale salad.


I know it seems fussy to some, but I love to massage my kale salad. I can sit and veg out while I'm massaging the kale - no need to moderate heat or get a pot or pan dirty. I can do this all in the serving bowl. Just put some crunchy salt, a little oil, and a little acid into the bowl and massage for as little or as long as you want. I taste as I go, so when the kale is sufficiently supple and sweet, I stop the massage.


Sunday's dinner was a massaged kale salad with segmented oranges (I got a new knife, or "sword" as the boy calls it) and braised lamb necks. Lately, since I'm trying to figure out more one pot cooking, I've been throwing a few handfuls of wheat berries and more water into the braise about 45 minutes before serving time. The grains turn out flavorful, and any leftovers are destined to be a bed for my poached or fried egg breakfast.


And abruptly transitioning onto the subject of knitting, if anyone is interested in buying some Hiya-Hiya interchangeable needles, I have both the small and large sets for sale. The large set has never been used. I'll probably put them up for sale on Ravelry soon, but if this is something you're looking for, lemme know and I can give you more details and pics! They are the 4" steel tips (not the sharps). $45 for the small set, $65 for the large set, or $100 for both. Paypal payment please, and free shipping in the US.

Thursday, March 15, 2012

Lop Yuk, Round 1


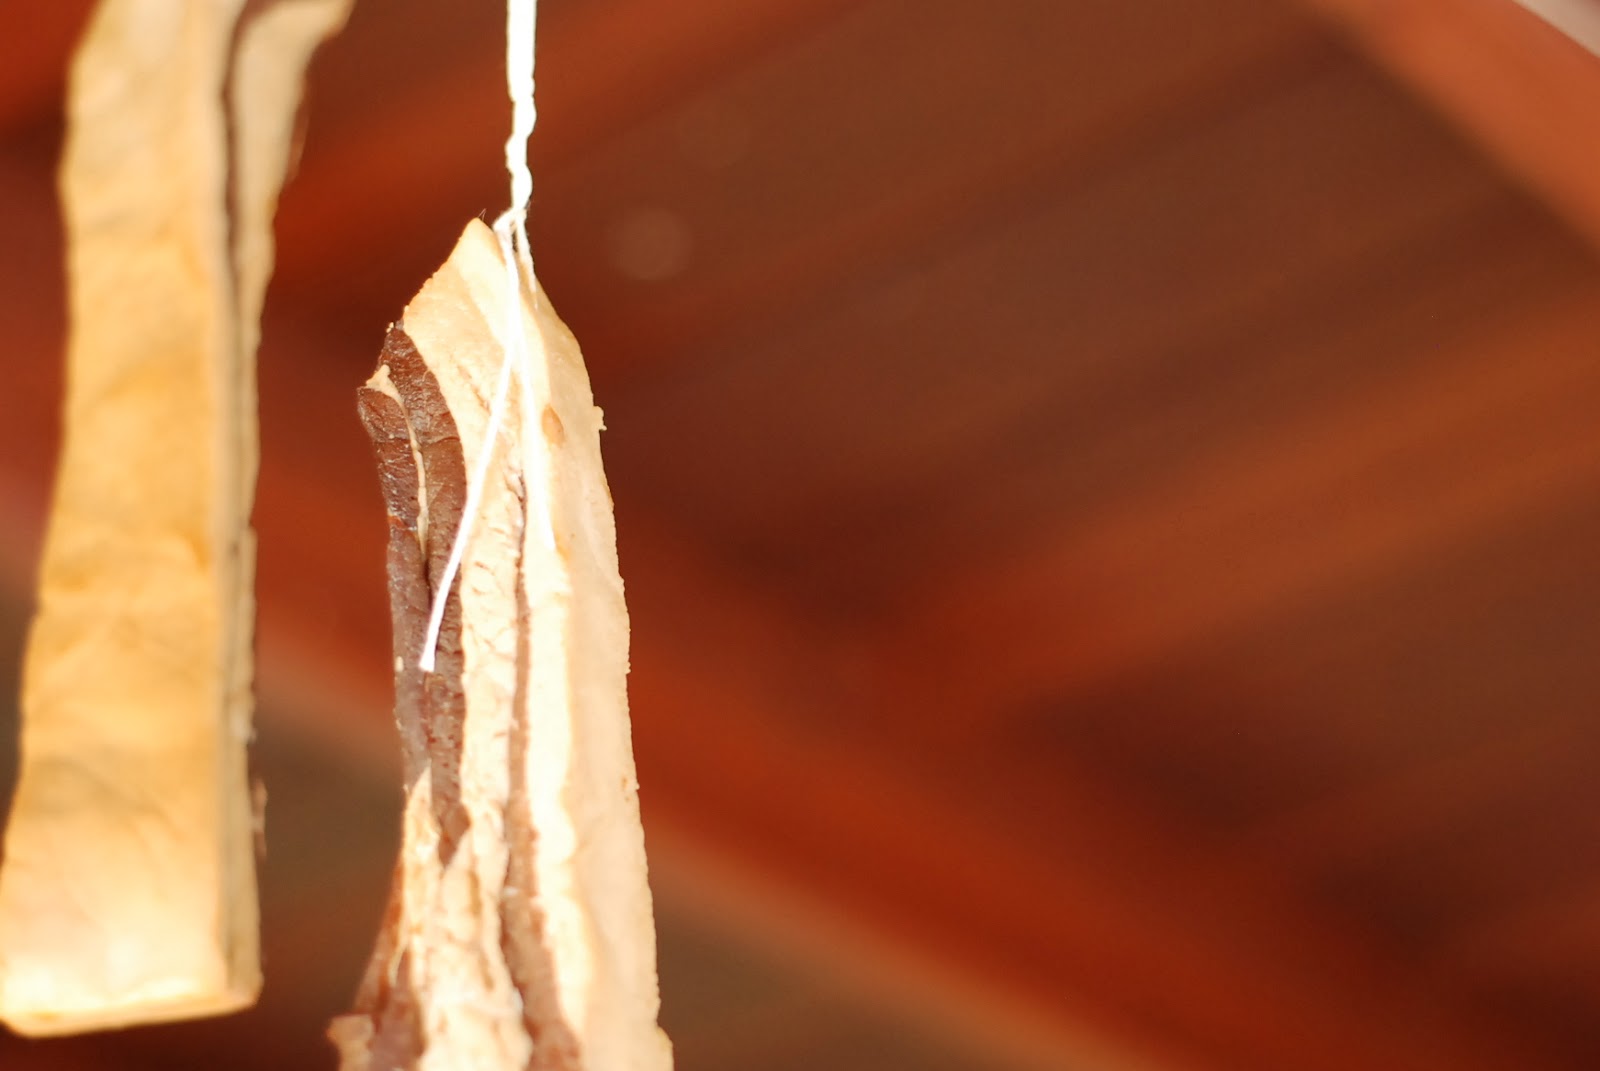
My first round of lop yuk, Chinese bacon, is finished and in our bellies! Since it's really fatty, I mostly used a slice or two in vegetable and tofu stir-fries. Because it's nitrate free, the bacon is black and not the lovely pink color of pancetta. It's not the most appetizing color, I'll admit, but once you sauté it in a wok and get a good coat of crispy char on the bacon, it looks like any other hunk of fatty meat.

Since lok yuk is not smoked, I'm not sure why it's called bacon. It's more like Chinese pancetta. First, you marinate 2-inch slabs of pork belly in Shaoxing wine or Chinese whiskey, light soy sauce, and dark soy sauce. I also added some brown sugar, although I'm not sure if it's traditional. The pork belly stays in the marinade for 3-5 days. At the end of that time, poke a hole in the meat with a chopstick, insert string through the hole, and tie the meat piñata up above your kitchen sink. According to my aunt, this is what my grandmother used to do, so the boy and I decided that we'd do the same as a nod her.


Again, the boy wanted to know if I was trying to kill us, but I pointed out that all of my mom's siblings are alive and kicking despite growing up eating lop yuk.  No pink slime as thrown into the mix, either.

Saturday, February 11, 2012

Preserved Meyer Lemons


I have yet to have a Meyer lemon abundance since my pitiful little tree seems to be nothing more than an appetizer for slugs. Luckily, I have a friend whose tree is overloaded with Meyer lemons. She was kind and gave me a bucket of lemons when I told her my sad, lemonless, slug filled tale.


Preserved Meyer lemons are one of those ingredients that can make you seem like a master chef. Season some chicken thighs with cinnamon, cumin, and salt, then stick it all in a cast iron pot (or a tagine if you are lucky enough to own one) with dried fruit, olive oil, and preserved lemon rind. 25 minutes later, dinner's done!

Making the preserved lemons is easy. I start off by scrubbing the lemons, cutting off the stem end, and then quartering the lemons lengthwise. When you quarter the lemons, don't cut them all the way down. Leave about a 1/2 inch at the bottom so the lemons stay partially intact. Sprinkle a bit of salt into the cut lemons, then layer them in a clean jar with a cinnamon stick and a couple tablespoons of salt.


Once the jar is full, close the lid and let it sit for a few hours and liquid will start to fill the jar. I top off the jar with lemon juice and more salt before sticking the jar into the refrigerator.


In about a week, you'll have a secret weapon you can add to stews, soups, paellas, and risottos.

Tuesday, June 7, 2011

If I cook like it's summer, will summer come?


Sunshine seems increasingly rare these days, and the past weekend was full of wind and rain. Yet, I had a 1/4 pound of cherries that needed a purpose. Since they weren't that sweet, I stewed the cherries with some vanilla sugar, a pinch of salt, bourbon, and a splash of balsamic vinegar.


I roughly mashed them after stewing, then folded them into vanilla ice cream batter. Since I was feeling lazy, I didn't commit to making a vanilla custard. Instead, with a nod to the Ben and Jerry's ice cream recipe book, I whipped a couple of eggs and added sugar, milk, and cream to the batter. It was simple and more airy than a custard based ice cream, but the drawback is that it isn't as rich (only 2 egg yolks versus the 4-6 I'd normally use) and is hard to scoop. Still, is there such a thing as bad ice cream, especially when served with bourbon whipped cream?

I'm almost finished with another cardigan (someone please stop me!) that I can post soon. But for now, I'll leave you with a picture of my afghan. I stated the afghan on 5/24/10, and as of today I have 85 rows complete. I'd love to have this complete by the end of summer, although with the way this summer is starting out,  I should try to finish this ASAP.

Tuesday, June 30, 2009

Cardamom Cookies


I recently had the pleasure to attend a potluck bridal shower. In lieu of gifts, the bride-to-be asked us to make a dish for the party and to bring copies of the recipes for all to share. Brilliant! The only problem was that I was assigned dessert and the boy is the resident cookie maker. Since I didn't think he'd make cookies for a bridal shower, I found a simple recipe for cardamom cookies in Deborah Madison's Vegetarian Cooking for Everyone. I love her dessert recipes because they are not fussy and not too sweet.


I made the dough at 11 PM in the evening - it took me less than 10 minutes to make the dough and to clean up. I rolled the dough into two 1" logs, wrapped them in plastic, and stuck them in the freezer. The next day, I took the dough out of the freezer as I was drinking my morning coffee. After my second cup of rocket fuel, I slice the dough in 1/4" coins, and popped them in the oven. Easy!


If I were to make these for just the boy and I (I can hear him saying "Yeah, right. You never make desserts for us!"), I would omit the powdered sugar dusting. They taste decadent straight from the oven. However, since I was trying to trick everyone at the bridal shower into thinking that I was a fancy baker, I opted for the topping the cardamom cookies with fairy dust. It worked! People thought I was some kind of baking wunderkind and I did nothing to dispel that notion.

Tuesday, March 11, 2008

How to Make Sauerkraut (Choucroute)

Before my fateful trip to Alsace, I didn't think much about the lowly cabbage and I certainly didn't think much about sauerkraut. Sauerkraut was the stuff I picked off my hot dog. It was the rubbery white stuff that was always too tangy, too salty, or just too weird for me to eat. Then, I was lucky enough to spend 2 weeks in Alsace, where cabbage is king. Just look at this dish, choucroute garnie:
The woman who owned our guest house made this memorable dinner for us. Okay, I'll admit that it doesn't look like the most delicious thing ever, but it is - don't be fooled by its humble appearance! It is basically a casserole layered with choucroute (sauerkraut), liver dumplings, and sausages. The choucroute was unlike any sauerkraut I had before: it was only mildly sour and it still had hints of green, both in appearance and taste.

When I returned to the States, I just had to eat more sauerkraut. However, store bought sauerkraut was just as awful as I remembered it, which meant that my only choice was to make it myself.

Making sauerkraut seemed relatively simple, the real stuff is just cabbage and salt, but I was skeeved out by the fermenting vessel. Most instructions I read talked about making your 'kraut in a plastic bucket with a pillowcase over it. Yuck. Those same instructions talked about how it is important to monitor your 'kraut and to skim off any white scum that floats to the top. Double yuck.

Enter the Harsch crock. Although wonderful sauerkraut can be made without it, it made a lot less scary to have this tool on my side since it eliminates the "skim off the white scum" step that it is most 'kraut recipes.

Are you interested in tasting what real sauerkraut? Unless you have an awfully good supplier in your neighborhood, tasting fresh sauerkraut means making it yourself. So, here's my method for making tasty 'kraut. You can click on the pictures if you would like to see a larger image.

Tools you'll need:
  • Knife
  • Cutting board
  • Kitchen scale
  • Food processor with a slicer blade (not necessary, but a huge time saver)
  • Crock and weight stones
  • Masher (I use a French rolling pin)
  • Pen and paper
  • Calculator

Ingredients:
  • Cabbage
  • Kosher or sea salt

Start with green cabbages. In my neighborhood, I can find organic green cabbage at Monterey Market and El Cerrito Natural Foods. Pick cabbages that seem unusually heavy when you pick them up. Give them a good rinse in the sink and let them dry.


Next, use the knife to halve, and then quarter, each cabbage on the cutting board. Use the cabbage's core as its centerline. Once the cabbage is quartered, you can easily cut out its core.

Weigh the cabbage and write down this number. You'll need it later when you have to calculate the needed amount of salt.

Slice the cabbage using the thinnest slicer blade on your food processor (a mandolin or even a knife can be used instead to slice the cabbage).

Now, it is time to calculate how much salt you'll need. Grab that piece of paper with the cabbage's weight. What you're going to do is to calculate 2% of that weight. This resulting number is how much salt you'll add to your cabbage. For example, if you have 1000 grams of cabbage, you'll need 20 grams of salt because 1000 g X .02 = 20 grams. Use the scale to measure your salt.

Here comes the fun part! First, put a layer of salt on the bottom of the crock, and then place a layer of sliced cabbage. Repeat until the salt and cabbage is all in the crock.


Pick up that stick, channel your teenage angst, and mash that cabbage!


As you mash, liquid from the cabbage will release, resulting in a satisfying "walking through the mud with rain boots" sound.


Since I like to ferment around 8 pounds of cabbage at a time, I repeat these steps a few times until my 7.5 liter crock is at capacity.

When your crock is full, place the weight stones on top of them. They should press down on the cabbage with enough force for the stones to be submerged.

Stick the lid on your crock, fill the gutter with water (if your crock has one), and let it sit in a cool, dry place. The temperature in my house fluctuates between 55-65 deg F, and at this temperature, it takes 4 weeks for my sauerkraut to be ready to eat. Once I like the consistency and taste of my sauerkraut, I store it in the refrigerator to slow down the fermentation process.

Enjoy! If you have any questions or make this using these instructions, please let me know in the comments section.

LinkWithin

Related Posts Plugin for WordPress, Blogger...