Monday, September 14, 2015

Tempeh for the People

Tempeh pan fried with chorizo seasoning
I've been on a tempeh kick for the past 3 weeks. And, as you may have figured out by now, when I get into something, I *really* get into something. So far, I've made 3 batches of tempeh, one with soybeans, another with soybeans and adzuki beans, and another with soy/adzuki/mung beans. All three have been delicious!

If you've every looked into making tempeh yourself, believe it when you read that fresh tempeh is nothing like the stuff you buy pasteurized and packaged in the stores. Fresh tempeh smells nutty, slightly sweet, and mushroomy. When cooked, which is the only way to eat it, the nutty flavor is intensified. I'm experimenting with different additions to my mixes, so far adding different beans. I want to try a batch with added sesame seeds and peanuts (not together, though).


For my first batch, I followed the known methods carefully, incubating my tempeh in a perforated plastic bag. It turned out delicious and was a good confidence builder.


For my second batch with adzuki beans and soybeans, I pressure cooked the beans together. This was a mistake because while the soybeans stayed firm, the adzuki beans disintegrated. Still, not wanting to throw away anything, I forged ahead and mixed in the tempeh starter, Rhyzopus oligosporus. I also used glass containers with no holes during incubation. The mycelium took off! I was so glad that I didn't dump that batch over a perceived mistake.


When you don't use a plastic bag to tamp down the mold,  it begins to look a little gnarly.


However, just cut the tempeh crosswise and you'll get the familiar form factor. I like how the jar made this batch of tempeh round, perfect for burgers.


My third batch took longer than 48 hour to form because I filled an entire jar to the top with the bean mixture. After 2 days, only the top half had enough mycelium, so I cut off the good part and put the rest in a shallow stainless steel try. The change of container gave more oxygen to the tempeh, and it finally took off. So, if you don't use a perforated container, only fill the tempeh mixture a 2-3 inches high so moisture evaporates instead of condensing in the container.

Delicious tempeh sandwich
Between the tempeh I'm making and the fish the boy is catching, we really don't have a need to buy meat. It's pretty cool! 

So far, I've made a Rueben marinade and a traditional, Indonesian marinade of salt water, ground coriander, and crushed garlic. Both were delicious.

Tempeh hasn't really taken off in the US, although at various times, optimistic vegetarians predicted that tempeh was going to be the next big thing. One optimist lives near me in Lafayette, CA, and he co-wrote The Book of Tempeh (an excellent read). I think one reason that DIY tempeh hasn't taken off is because people get grossed out by mold. When I posted mold pictures on Facebook and Instagram, there wasn't a favorable reaction. What I though was cool, others thought was spoiled and gross. Does this look any worse than mold-covered hanging sausages, blooming cheese, or a dead meat animal? To me it doesn't. It's the reality of food. 

Lately, I've been thinking of tempah as tofu's wild, tastier, cousin. I love tofu, especially fresh tofu, but it's a bitch to make in comparison to tempeh. Plus, it's mild. Tempeh, depending on how long you ferment it, can have a blue cheese funk.

If you want to make your own tempeh, I got my starter from Cultures for Health.

My blog posts are infrequent, at best, so if you want to see what I'm up to, follow me on Instagram. My user name is sungoldtomato.

Monday, August 3, 2015

Preserving the Catch


Once a week, the boy has been kayak fishing. For the most part, he isn't catching that many fish and we can eat what he catches within the span of a few weeks. Recently, however, he brought back a ridiculous haul of rockfish and ling cod from Half Moon Bay. It was time to learn some different ways to preserve fish.


My first experiment was salted rockfish, fashioned after Spanish bacalao. I layered a couple of fillets with salt, and then let them rest in the refrigerator for 48 hours.


After a brief rinse, I dehydrated them at 145°F for 10 hours, at which point they were leathery. For now, I'm storing them in the freezer in a plastic bag, but I have a stainless steel airtight box on order that will hopefully be a plastic-free solution to storing the dried fish.


I have yet to cook with the salted rockfish, but I'll report back when I do. Hopefully, my NorCal bacalao will turn out delicious.


The second fish experiment was cured salmon. The boy's kayak fishing partner caught a 10-lbs king salmon off of Bodega Bay, and he was kind enough to share the fillets. We ate some right away with herb butter, and I chose one filet to cure with salt, sugar, peppercorns, parsley, and dill. I had to weigh the salmon down to press out the excess liquid.


It's good! I have a huge chunk of salmon to cook with or to enjoy as is - such a luxury. Usually, I don't even buy cured salmon because the local, wild-caught stuff is expensive (I spied it at $24/lbs at Whole Foods), so it's going to be fun figuring out different ways to use this. If you have a favorite recipe with cured salmon, please let me know!


Since we ran out of paper towels, I decided to put together a jar of rags that we can use in place of paper towels in an attempt to waste less. So far, this has been an easy transition with minimal complaining from the other occupant of this place, but nothing really disgusting has gone down yet (no puking animals). I have a feeling the second that one of us has to deal with something gross, we may cave and the paper towels will reside on the counter once again. But, for now, this works and is minimal effort.

Wednesday, July 29, 2015

(Not My) Grandmother's Slippers


I'm still knitting! I know that it doesn't seem like it, but I do have some small projects that I'm clicking away on while watching American Ninja Warrior, a guilty indulgence that motivates me to climb harder routes at the gym.

These slippers are for a friend who fondly remembers getting new pair of slippers annually from her grandmother. Although her grandmother is no longer here, my friend did have her grandmother's pattern and the last pair of slippers (preserved in a  Ziplock bag) tucked away. With those items in hand, I was able to recreate the slippers - I'm a sucker for a challenge.

I love the way these turned out. They do remind me of something my grandmother or an elderly relative would knit for her beloveds.

These slippers were cool because they are knit flat and then seamed together. My project notes are here.

Does anyone know of a similar pattern? I was trying to find the original source, but no luck.

Monday, June 29, 2015

Vegan Truffled Mayonnaise Recipe


The aquafaba mayo obsession continues! A few beautiful artichokes made their way into my produce cart, and I just so happened to have some aquafaba on hand because I can't stop making curried chickpea rice pulao. Artichokes call for mayonnaise, and hence this recipe was born!

I have a stockpile of aquafaba and some freeze dried fruit to experiment with now (Safeway carries organic free dried fruit, and Trader Joes carries regular freeze dried fruit)! Powdered freeze dried fruits are a wonderful way to use natural flavoring and coloring to cakes, macarons, and other baked goods without adding extra moisture, so I'm excited to start experimenting! I really want to make a vegan mochi cake.

Although I'm an omnivore, I've found that creativity can be induced when I restrict ingredients. I've made the most amazing food when forced to cook from my pantry, and cooking this way gets me out of ruts.  That seems backwards, but cooking this way challenges me and makes me create instead of following along.

Vegan Truffled Mayonnaise

makes 1 to 1 1/2 cups of mayonnaise

1/4 C      aquafaba
2 T         white truffle oil
1 T         white wine vinegar
1/2 tsp    homemade garlic salt (use 1/4 tsp if using store-bought garlic salt)
1 T         Dijon mustard
3/4-1 C   peanut oil (any neutral oil will do)

special equipment: immersion blender or blender

Blend together the aquafaba, white truffle oil, white wine vinegar, garlic salt, and Dijon mustard on low speed. After a few seconds, start drizzling in the oil until the mixture emulsifies. Continue to add at least 3/4 C oil. Stop blending and taste the mixture, adding more salt or vinegar if necessary

Wednesday, June 24, 2015

Homemade Garlic Salt


For consecutive weekends, the boy has spent half his time kayak fishing. What this means is that, if we're lucky, once a week we have fish for dinner. Fish smells like, well, fish, so the best way to prepare it without being reminded that we had fish for dinner days later is to grill it outside. Especially since we're eating different fishes and want to compare their tastes, we're marinating them the same way with shake of salt, a grind of black pepper, a drizzle of olive oil, a mince of garlic, and a squeeze of lemon. So far, we've had striped bass, rock cod, halibut, and skate (listed in order of my preference) prepared this way.

The boy has been asking me to pick up garlic salt from the store for ages because sometimes the fresh garlic burns on the grill, and I've hesitated because it seems stupid to buy something that I knew had to be easy to make, especially with our dehydrator. So, when we found ourselves in Martinez as the farmers' market was closing, we struck a deal with a garlic vendor and got 3 pounds of garlic for $3. Score! Now, it was time to figure out how to make garlic salt.


The hardest part is peeling the garlic, which is to say, making garlic salt is not hard. Once the garlic cloves are peeled and washed, it was quick work to chop it up and spread it out on a dehydrator rack. I put the temperature to 125 °F, the vegetable setting, for 8 hours.


It will smell like Gilroy in your house for the first few hours, so you and your roomies will be safe from vampires.


Once the garlic is dehydrated, let it cool to room temperature, and then pulse it in a blender 4 or times times and assess the volume - my blender has graduated markings on the side, so I saw that I had about 1 cup of garlic. I added 1 cup of flakey sea salt to the blender. If you want your garlic salt less garlicky. add more salt. Continue pulsing the blender until the garlic salt is as course as cornmeal. That's it! Now you have homemade garlic salt. For the quantity I processed, I ended up with about 1.5 cups of garlic salt.

Monday, June 22, 2015

Aquafaba Basil and Sherry Mayonnaise


After this week's success with the black bean aquafaba macarons, I decided to try my hand at mayonnaise. I've made egg mayonnaise plenty of times with my immersion blender, using one egg for a batch. I find that this is the perfect amount for my mayo needs, and this usually goes hand in hand with the asparagus and tomato seasons.

It worked! Other than substituting 1/4 C of reduced aquafaba for one whole egg, the recipe is the same as the non-vegan version.

A note about aquafaba: to use it as an egg substitute, the aquafaba should be reduced to the consistency of egg whites. When I first started experimenting with the stuff, I'd refrigerate it after reducing. If the aquafaba gelled in the refrigerator, it has been reduced too much and you'll end up with really dense macarons or mayo. No worries, though, because you can always think it out with a little bit of water.

Aquafaba Basil and Sherry Mayonnaise

1/4 C        reduced aquafaba (I used black bean water aquafaba)
1 tsp         sherry vinegar
1 tsp         mustard
1/2 tsp      salt
3/4 - 1 C  peanut oil (any neutral oil will do)
1/4 C        loosely packed fresh basil leaves

Special equipment: immersion blender or blender

Blend together at low speed the aquafaba, sherry vinegar, mustard, and salt. After a few seconds, start slowly adding the oil until the mixture emulsifies. This usually takes me about 3/4 cup of oil, but sometimes it takes a little more. When you get the desired consistency, add the basil leaves and blend until incorporated. Taste for salt and vinegar and adjust if necessary.

Wednesday, June 17, 2015

Black Bean Macarons


Since I am sick of eating chickpeas in any form, I decided to make vegan macarons using black beans. Black beans are way more tasty. (Have you ever tried refried black beans mashed with a fruity olive oil and chipotles in adobo? If not, hop to it!)


The black bean aquafaba did not look promising at first. I had whip it on high for at least 10 minutes before it got to the soft peak stage. Once I added the sugar, though, it whipped up just like the chickpea aquafaba. There is now way I could have whipped this liquid up by hand, though, because it was going for at least 15 minutes.


The resulting macaron shells were a lovely shade of light purple. I filled these guys with a pistachio/cocoa/chili ganache to play up the slight fruitiness of the black bean macarons.

I am so relieved that I can make macarons with other types of bean liquid because chickpeas were becoming boring! On the Vegan Meringue group on Facebook, others have reported that they can make meringues from lentil aquafaba, kidney bean aquafaba, and the water that's packaged with fresh tofu. This stuff is so fun to experiment with! 

Has anyone else tried making these and, if so, what type of liquid did you use?

Monday, June 15, 2015

BBQ Jackfruit Sandwich


In addition to all the aquafaba posts, vegan blogs have been buzzing about pulled "pork" sandwiches made from canned jackfruit. The canned jackfruit, I read, had to be young green jackfruit in brine, not the dessert jackfruit in syrup. I was intrigued. While in Sri Lanka, we made a jackfruit curry, and it did have a meaty texture.

I opted to use canned jackfruit instead of buying one (they are huge, although you can buy partial jackfruits at 99 Ranch) because I read about how sticky and messy they were. If I liked the BBQ jackfruit, I reasoned, I could buy one next time.


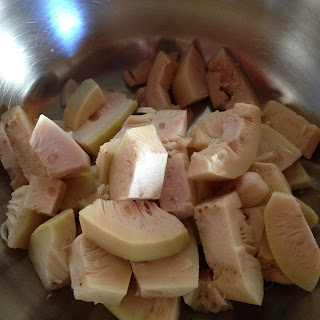
After I drained and rinsed the jackfruit, I cut out off the core of each segment, leaving the feathery part of the jackfruit and some of the rind.


After I prepared the jackfruit, I made a BBQ sauce, which I improvised starting with the Joy of Cooking's ketchup recipe. My sauce was like ketchup with a hefty does of liquid smoke, smoked paprika, worcestershire sauce (not vegan), caramelized onions, and brown sugar. Once the sauce was done, I tossed in the jackfruit and simmered it for 30 minutes. After 30 minutes, I shredded the jackfruit just like I would for pulled pork, using 2 forks.

Since I didn't have hamburger buns but I did have loads of flour, I made Taste of Home's 40-minute hamburger buns recipe. Unwillingness to drive to the store is the mother of invention, in my case.


The buns turned out beautiful, although the batch I baked with the Silpat were a little too brown on the bottom, so I should have rotated the pans 1/2 way through baking. Flavor-wise, they were simplistic when compared to Acme breads or any other bread with a starter, but for 10 minutes of work, I'm not complaining.

Will I make this again? Maybe. It tasted mostly like BBQ sauce since the jackfruit absorbs flavors. The texture was much softer than pulled pork, so if I do make these again, I will bake the jackfruit shreds first to firm them up or run them in the dehydrator for a few hours so they can have some chew. The boy thought they were pretty close the real thing. It is easier to keep a couple of jackfruit cans in the pantry than to go out and buy pork if the mood strikes for BBQ sandwiches, so there's that advantage. And, since I always have homemade canned tomatoes around, making BBQ sauce isn't a huge deal.

Wednesday, June 10, 2015

Macarons! Whoop whoop!


Finally! I've made 5 small batches of vegan macrons, and it wasn't until the 5th try that I got both feet and no raw middles. To celebrate, I made a coconut pistachio ganache for filling. I wish I had a small piping bag so I could make the filling pretty, but it's me we're talking about! It took me a long time to get the macarons right because I kept on doing stupid things like opening the oven early, peeling them off the parchment paper before they were cooled, and refusing to weigh my ingredients. Baking is tedious for me, while cooking is relaxing. However, I was determined to make these because making macarons out of something I regularly pour down the drain (chickpea cooking liquid) is magical and appeals to my thrifty ways.

What isn't thrifty is almond flour. The brand I like to use, Bob's Red Mill, goes for about $13/lb when packaged. I like this brand because they grind up blanched almonds, so the bitter skins are removed. However, while at Safeway to purchase a 24-pack of chicken hot dogs (disgusting training treats for Sesame), I saw that there is now a huge bulk section. Safeway had Bob's Red Mill almond flour in bulk, and it was $6.49/lb. Score! Their organic nuts and beans were also several dollars cheaper than other stores, so if you don't think Safeway is the devil, go for it!

Floral Frosting's and Let's Go Bake a Cake's vegan macaron recipes and were helpful. I followed the second recipe, listing all the ingredients by weight and omitting the coloring and seam seeds. Avocados and Ales also has a killer macaron troubleshooting guide. There  Facebook group Vegan Meringues - Hits and Misses is also a great resource that includes lots of pretty and sometimes hilariously sad pictures of people's aquafaba experiments.

For the macaron filling, I winged it. Although I'm not vegan and I could have made a buttercream, I stuck to the vegan theme and made a pistachio ganache that is dairy-free. I'll post the recipe below in case anyone else is interested in trying it.


Pistachio Ganache

1/4 c   raw pistachios, whole
1 T     water or non-dairy milk
1/2 c   powdered sugar
2 T     refined coconut oil
pinch of salt


Pulse the pistachios to a powder using a Vitamix or other blender. Set aside.

In mixer, using paddle attachment, mix the coconut oil on medium speed. Add powdered sugar and ground nuts. Add water or non-dairy milk 1 T at a time, adding more if needed to make the paste spreadable.

Monday, June 8, 2015

Greaseball Hates Your Plant-Based Foods


Greaseball is a straight up carnivore, and as such, he frowns upon my plant-based food experiments. They leave him hungry.

Speaking of plant-based food, I watched "Forks Over Knives" last week, and everyone in that movie avoids the "V word" and instead says "plant-based foods." Come on! Just say "vegan" and don't dance around it! At first, I thought they were avoiding the word because they were going to talk strictly about diet and not lifestyle changes, but that wasn't the case. It reminded me of the movie "Let Me Be Frank," when Frank who had already signed a contract to let Cafe Gratitude take over his diet and lifestyle, was dumbfounded when his keepers cleaned out the microwave from his apartment. You know why? Because no one told him, or he didn't figure out, that Cafe Gratitude was a vegan raw food joint. I understand that there is power in words and many people have negative associations with veganism, so it was interring to see how "Forks Over Knives" rebranded vegainism as "plant-based diet."

As many of you know (and probably why my RSS subscribers are leaving by the handful every week), I am a bit obsessed with nut cheese. I even went to a panel discussion on vegan cheese during Oakland Veg Week, although that was a little weird. The woman next to me said earnestly "You are very brave" during a show of hands of omnivorous audience members - I suspect I was the only one there who was an omnivore because I didn't see anyone in front of me with a raised hand I a felt too weird to look behind me in the room of about 100 people. I was the most excited person in the audience, though! The discussion was interesting, but it was more geared towards vegetarians who were thinking about crossing over to veganism and not those of us who just want to make a good nut cheese for the sake of nut cheese.


And speaking of nut cheese, a phrase I find myself saying often, I made the most amazing vegan nacho cheese sauce from Kenji at Serious Eats. We paired it with corn chips and black bean burgers and we felt fat and happy afterwards. Why is oozy cheese sauce such balm for the soul? The most interesting part of the recipe was that it achieved it's stretchy properties from russet potatoes that have been put through a high speed blender. There was no kappa carrageenan, agar, or xanthan gum added. Just potatoes! I want to tweak with the flavorings to make a smoked gouda cheese sauce because my last attempt with some carrageenan was a little funky. This nacho cheese sauce is going to get a second life as mac and cheese very soon.

Wednesday, June 3, 2015

Aquafaba is Weird and Wonderful


Liquid leftover from cooking chickpeas, when whipped with sugar and vanilla, tastes just like marshmallow fluff!  The aquafaba (water + bean) craze has been going around mostly the vegan blogosphere for the past few months, but it was new to me.


When baked, said marshmallow fluff turns into meringues. Vegan meringues taste just like eggy meringues, too!


I've taking some good-natured ribbing about turning chickpea brine into a dessert, but how is it any different or grosser than using egg whites? Egg whites are just as slimy as gooey as chickpea brine. It's a matter of perspective. Also, to mask the eggy taste, lots of recipes call for vanilla, and eggless meringues benefit from vanilla as well to mask any perceived bean taste.


Personally, I'm all for kitchen experiments. I'm not vegan by any stretch of the imagination, but I do like the idea of taking something that was formerly a waste product and turning it into something fabulous and cool or making something, like cheese, out of nuts. My next experiment is going to be aquafaba mayonnaise.  Fortunately, I have plenty of canned chickpeas (I pressure can big batches of beans once every 3 months), so I have organic aquafaba galore!


I'm a deficient baker, so if anyone has any idea why my meringues turned out hollow, please leave me a comment! I added 1/2 c of sugar to probably 1/3 cup of aquafaba, and baked these at 200 °F for 2 hours. I don't think I ever made traditional meringues before, so this is all new to me.

Monday, June 1, 2015

Roasted Chickpea Snack with Smoked Spanish Paprika


In Sri Lanka, my snack of choice was fried chickpeas. I had a bag of them I took on the bus, and I'd happily munch on them between meals. I've been thinking about making my own version for awhile, but the final push came when I was trying to think of a vegan snack to take to crafty gathering. Sadly, I ran out of nut cheese, but I did have some cooked chickpeas that were canned in quart jars.

Since deep frying takes too much tending, I wanted to make these chickpea snacks by roasting them in the oven. I'm happy to report that my first try turned out crunchy and addictive. In other words, it was the perfect snack!

For seasoning, I mixed together smoked Spanish paprika, cumin, salt, and evaporated cane sugar. After I rinsed and dried the chickpeas (using a clean kitchen towel), I gently stirred the spice mixture and olive oil over the beans. I adjusted the spices until I felt that the beans were just slightly underseasoned because I thought that the seasoning would taste right once the chickpeas were dried. In retrospect, I should have added a touch more salt, but that could have been corrected once the beans were out of the oven.

Once the beans were seasoned, I spread them out, single layer, on a baking tray brushed with more olive oil. They were roasted at 350 °F with the convection fan on (roast at 375 °F if you don't have a convection oven) for roughly 40 minutes. After 15 minutes and every 10 minutes afterward, I checked the chickpeas and shook them around in the pan so they didn't stick. They are done when the beans are golden brown, but not burned.


Wednesday, May 27, 2015

Granville Complete!


Granville is off the knitting needles, finally! It only took me 504 days. Nothing about it was hard, but for some reason, I kept on starting and stopping, and starting and stopping, and starting and stopping this project. I raced through the front panels and the sleeves, and then it sat. And then I raced through the back, and then it sat. And then I blocked the pieces, and then they sat. You get the picture.


The yarn is Hemp for Knitting's Hempwol in color 040. The cables really pop with this yarn, and it's light and warm. However, maybe due to the hemp, it's a little bit itchy. I'm hoping that this hoodie will soften up the more I wear and wash it.


Monday, May 25, 2015

The Face of Optimism


We pass by this sign often, and today I finally got around to snapping a picture of it. It's on the side of a fairly busy residential street, and the thought of a cat crossing right here makes my heart skip a beat. The world is dangerous for outside cats!


Greaseball only goes in the backyard, and I supervise him when he does that because if I didn't, he'd eat all the weeds and then throw up. I suppose we're lucky in that he's never wanted to climb a tree or climb a fence. Fifty-Fifty would periodically escape, and we'd have to convince her to come off of the roof of out from underneath our neighbor's deck. She was an adventurer, but Greaseball? Not so much. He likes napping.

Wednesday, May 20, 2015

Brown Derby


One leftover ruby red grapefruit, some nondescript bourbon, and honey make a cocktail worth singing over! Shake together 3 parts bourbon, 2 parts grapefruit juice, and 1 part rich honey syrup with ice. Strain in to a glass and enjoy! If you're feeling fancy, add a grapefruit peel twist. I wasn't feeling fancy.

I had some cheap scotch that the boy bought from Trader Joe's that I used instead of the bourbon, and it was still delicious. Is it sad that the only things I buy at Trader Joe's are toilet paper, dried pasta, and booze? Their produce is covered in unnecessary packaging and never looks fantastic. Once in awhile, I'm seduced by their avocados, but they all ripen at once and then at least one of them will end up in the compost pile. Where I grew up, TJs was the best supermarket around, but now I'm spoiled by multiple farmers' markets (the El Cerrito Tuesday market has the best Asian vegetables), Monterey Market, and Berkeley Bowl West.

One thing I cannot find in the Berkeley area is bulk peanut oil. I go through a 3L bottle of peanut oil every 6 months because I use it for stir-frying and everyday cooking where olive oil's taste doesn't fit in.  Before I buy another plastic bottle of peanut oil, I'd like to find somewhere I can refill my existing bottle. If anyone has any nearby options, please let me know! A friend informed me I can find what I'm looking for at Rainbow Grocery, but it's far from me.

Monday, May 18, 2015

Dehydrated Snacks


Can a healthy snack replace a salty, crunch potato chip? This is what I wanted to explore when I got a new dehydrator. All my experiments with nut cheeses meant that I needed something to spread said cheese on. I was buying chips and crackers, but decided that a homemade spread deserved a homemade cracker.

First up was an amaranth cracker. Making it was simple enough: boil 1 part amaranth with 2 parts water. Add salt and any other seasoning you desire, and spread the mixture 1/4" thick onto dehydrating tray, and dry at 115 °F for 10 hours or more. I liked them, and the boy thought they were "not his favorite." His dislike over these could be due to me not seasoning them very well, but I liked them. They had good crunch, although it was like eating tobiko at a sushi restaurant: you find yourself chewing bits of amaranth minutes after you've finished the cracker.


Attempt #2 was beet chips. I read about making crispy beet chips, starting from raw beets. I thinly sliced the beets in the food processor, and then drizzled them with olive oil and a dusting of salt. They were dehydrated at 115 °F for 20 hours. Does beet taffy sound good to you? If so, you'll love these chips. If it sounds disgusting, avoid at all costs!  I liked them, but they weren't crisp. Further web research shows that maybe I need to fry them first, and then dehydrate them.


Attempt #3 was flax crackers, and for these, I borrowed a juicer. (Having a Vitamix, a juicer, and a dehydrator made my kitchen feel like a regular hippy hangout.) I juiced beets and carrots, mixed soaked flax seeds with some of the vegetable juice and pulp, and dried the mixture out for 10 hours, again at 115 °F. This time, success! While I need to work on scoring the dough so I can break apart the crackers into snackable sizes, the crunch and taste of these are perfect for dipping.


Attempt #4 was just as disgusting as it looks. I mixed together nut pulp, leftover from making nut milk, tahini, and I forgot what else into a dough and dehydrated it. These were recycled into dog biscuits.

I'm losing hope over my leftover nut pulp. The energy to freeze it for future use isn't worth it. I've read that I can dry the pulp, but it's flavorless! Sure, there's fiber, but there are more pleasant ways to get fiber into my diet. So far, nut pulp is good for dog treats and worm food.

Wednesday, May 13, 2015

Smoky Negroni


Substitute mezcal for gin in the Negroni recipe, and what do you get? A smoky Negroni, which is even better than a regular Negroni! I got the idea from Speisekammer's bar. There, it was served with a fancy vermouth, but I only had the non-fancy variety at home. Still, it was delicious.

If you want to make your own smoky Negroni, mix together equal parts mezcal, sweet vermouth, and Campari. I was out of Campari last night, so I made it with Aperol, resulting in a less bitter drink. Hey, since I'm already messing with a classic cocktail, what's one more substitution?

Monday, May 11, 2015

Bottle Drying Rack


Homebrewers are all familiar with the accumulation of beer bottles on the kitchen counters. The bottles can't be thoroughly cleaned in a dishwater due to the beer sediment, and therefore they pile up until they reach critical mass (i.e. someone gets fed up and starts complaining).

Our excuse for letting the bottles pile up is that we didn't have a good place to dry them. I hate counter clutter and we have limited counter space, so anything that needs to be hand washed is dried and put away immediately - we don't have a countertop drainboard. It's hard to dry a bottle immediately unless you want to shove a small rag into it or use a hair dryer.


The boy wanted to weld a bottle rack, but again, it would pig up some room on the counter and it would drain on the counter. We compromised on a simpler solution: a drain board that straddles the sink and holds the bottles upside down. He found some wood scrap, drilled some holes, and problem solved!


(Actually, the problem is almost solved. Someone still needs to clean the bottles out with a bottle brush.)

The rack works well for wine bottles, too. We save those as well because we have a friend who grows grapes and makes way more wine than he can possibly drink, an excellent quality in a friend.

LinkWithin

Related Posts Plugin for WordPress, Blogger...